Creating a Unique Tilt-Shift Photography Blurring Effect
Posted by Kenny in effects, lens, miniature, photoshop, techniques, tilt-shift on Wednesday, May 27, 2009
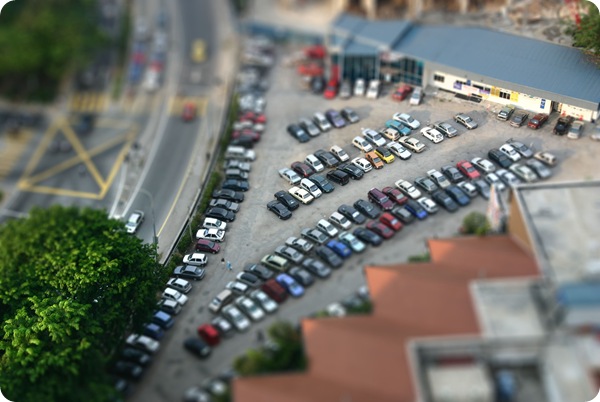
In the old days of photography, we often see techniques to create special effects done right from the stage of taking the shot. One creative technique of manipulating the sharpness of a shot and creating a fake depth-of-field look is tilt-shift photography. In the past, this method of displacing the a lens on bellows so that the plane of focus is not at the right angle to the film surface creates a unique effect that has the scene looking almost like a fake miniature.
| Look mom! Toy cars!!! |
What makes the scene look like a miniature?
When you take close-up of a miniature set, the first thing that sets the scene is the angle that you are shooting from. Usually, from a 25 degree to a 45 degree angle would be how you may be standing above the set to take the shot of the scene. The second factor is the shallow depth-of-field that will usually result as you are taking a close-up or almost a macro shot of the scene right up close. These two factors are what is required for your mind to perceive the view of a miniature scene.
Highlighting the focus of your shot.
This technique can also be used to the extreme level to highlight the focus of your picture. Such as in portraiture, you can simulate the effect by putting the focus of your subject rendered sharp whilst keeping everything else in the scene blur.
Sometimes in a particularly busy scene, you may resort to this technique to reduce the focus on distracting elements. Applying this technique keeps your scene simple and clean.
How do you simulate a tilt-shift photography blurring effect?
Step 1 : Picking your Shots

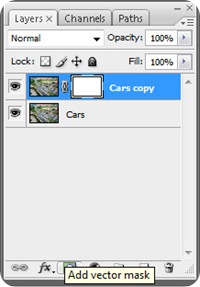
Step 2 : Creating a Layer Mask for the Blurring Effect

Step 3 : Masking the Sharp Area

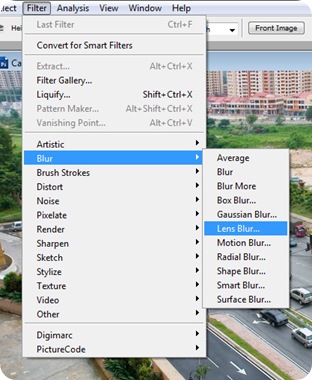
Step 4 : Using Lens Blur
Adobe Photoshop has a lens blur option where you can get quite authentic looking lens blur with the options of adjusting the details and settings of an actual lens. To create the effect using lens blur will take longer than the normal Gaussian blur technique but the result is much better.
Step 5 : Setting the Depth Map

Step 6 : Lens Characteristic Settings

Step 7 : Remove Layer Mask
Next remove the layer mask which you had set earlier

Before & After
Have fun trying it out!
This entry was posted on Wednesday, May 27, 2009 at 8:23 AM and is filed under effects, lens, miniature, photoshop, techniques, tilt-shift. You can follow any responses to this entry through the RSS 2.0. You can leave a response.


Post a Comment