Using Filters
Posted by Kenny in Published Article on Wednesday, April 6, 2005
Do you sometimes wonder why a professionally taken picture can look so full of impact? Sometimes you would realize a picture may have colours are “so bright” or a sunset that almost feels “warm” or a sky that is so “clear” and “blue” or even a portrait shot looks so “gentle” and “soft”.
A lot of times, the secret here is the clever use of filters. In analog (film) photography, a lens filter is attached to the front of a lens. Light passing into the camera is affected by the filter and this creates different effects in the final image.
In digital cameras, the built-in image processor mimics traditional filters to create the effects you would normally get. However, D-SLR cameras still uses physical filters as this allows for greater control of the effects of the filters.
If you are using a camera with threaded lens or a DSLR, here are several descriptions of some common photography filters that you can use to create interesting effects
UV Filter
If you use a SLR camera or a camera with threaded lens, a UV filter will be almost essential to keep on your camera all the time. It is a colourless filter and its purpose is to keep out ultraviolet light in the atmosphere and reducing atmospheric haze to capture images clearer.
Polarising Filter
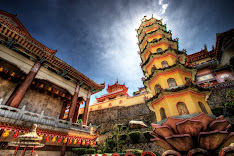
A polarising filter cuts out reflections by preventing light waves from certain angle from passing through to the camera’s sensor (or film). This means that it also affects the light coming from water particles (i.e. clouds) in the sky at the same time enhancing the image by deepening the colours that comes through. It also is useful in shooting through surface of water and glass which are reflective.
A polarising filter gives you deep, rich and high contrast colours
Neutral Density Filter
A neutral density (ND) filter reduces the amount of light that reaches the camera’s sensor without affecting anything else such as colour. This allows you to create effects such as slow shutter speed. ND filter also come in graduated form which is particularly useful if you want to balance out the amount of lighting coming from the sky, which is generally brighter to light from the ground.
You can use an ND filter to reduce the amount of light and slow shutter speed to create effects like this
Warming Filter
Sometimes your pictures can look dull on a overcast or cloudy day. Your camera may capture an image that can appear cool. Warming filters help to add a little warmth for a more desirable effect. Sometimes strong warming filters can give that extra touch to a bright sunset.
Cooling Filter
Cooling filters does the opposite of warm filters and are less commonly used for photography. But, it helps to add saturation and impact to a dull sky.
Blue filter can give you a cool, misty morning feeling
There are also other less common filters such as the Soft-Filter (which is great for portraiture), Intensifying-Filter (to increase individual colour saturation) and Infrared Filters (which enhances the effects of infrared radiation to create surreal light effects especially on green foliages)
The effects of a starburst filter
Simulating the effects of filter digitally
Here are two post-processing methods you can use on your digital pictures.
Creating a warm sky
1) Open up your picture
2) Create a new Layer and set the blending mode to Multiply
3) From the Tools box select the Gradient tool
4) Change your foreground colour to Orange
5) Select your gradient method as “Foreground to Transparent”
6) Drag the gradient from the top of your picture downwards
(adjust the length of this gradient accordingly based on the position of your the sky)
7) Finally, adjust the opacity of the layer to get the desired effect.
You can use this method with blue colour to deepen the colour of the sky.
Softening your portraits
1) Open up your picture
2) Duplicate the existing picture on another layer
3) Adjust the Opacity of the second layer to 50%
4) Click on Filter > Blur > Gaussian Blur
5) Adjust the blurring Radius according to how soft you want the image to be
(as a guide for a 6MP image, set the Radius to 10 pixels)
Filters are quite fun to use. It gives your pictures a fresh outlook. Experiment with different colours and effects. Keep it subtle for a realistic look or go to the extreme for some dynamic effects.